 King County
 Why Shoreline's Location on Puget Sound Changes the Job
Shoreline sits right on the water, and that location does two things to a house that inland King County neighborhoods don't deal with nearly as much: it pushes salt-laden marine air into every seam and fastener on the exterior, and it funnels wind-driven rain sideways into walls during winter storms instead of letting it simply run down and off. Add in the tree cover and shaded, damp yards common along this stretch of the Sound, and you get a long moss and algae season that keeps siding wet for months at a stretch rather than days.
None of that means siding is doomed here. It means the installation has to account for moisture management and corrosion resistance as a baseline requirement, not an upgrade. A lot of the siding problems we get called out to look at in Shoreline aren't failures of the material itself — they're failures of a job that was installed to a drier, calmer climate's standards.
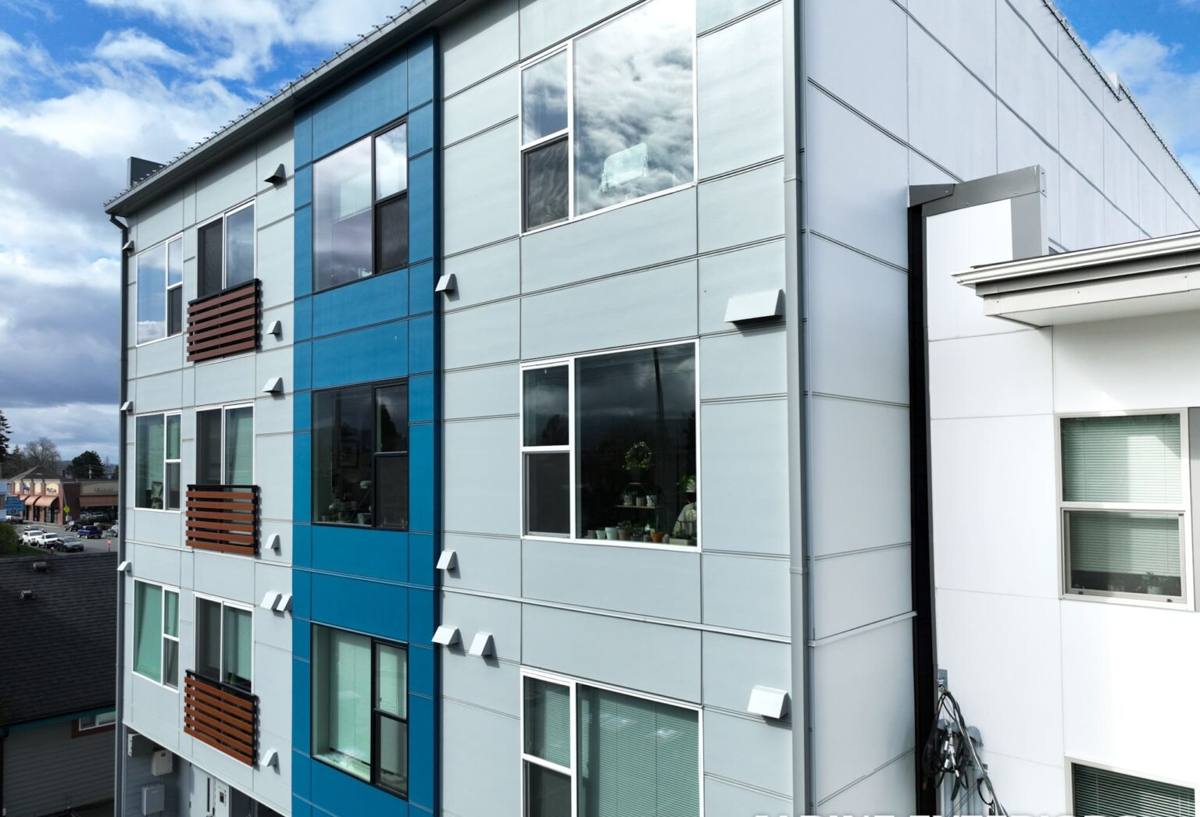
What Salt Air, Rain, and Moss Actually Do to a Wall
Salt Air and Corrosion
Marine air carries fine salt particles that settle on exterior surfaces and accelerate corrosion of anything metal — fasteners, flashing, trim screws, even the staples used to hang house wrap. Once a fastener starts rusting, it weakens, water follows the corroded track into the wall assembly, and you get a localized soft spot or stain long before the siding itself is the problem.
Driving Rain
Puget Sound storms don't always fall straight down. Wind pushes rain horizontally into vertical wall surfaces, especially on west- and southwest-facing elevations that face the water. That means laps, seams, and penetrations — hose bibs, vents, light fixtures, deck ledgers — take on far more water pressure than they would on a sheltered inland wall, and any gap in flashing or sealant becomes a path for water to track behind the siding.
Moss, Algae, and Prolonged Dampness
Shaded, damp exteriors that stay wet for long stretches are exactly where moss and algae take hold. Beyond the cosmetic staining, sustained moisture against a wall surface accelerates whatever underlying moisture problem already exists — it keeps wood-based products wet longer, it stresses paint films, and it can hide early warning signs of a leak behind a layer of green growth.
What a Correct Siding Installation Looks Like Here
A siding job built for this stretch of King County has to get the water management layer right before a single piece of visible siding goes up. That layer does the real work; the siding itself is the last line of defense, not the only one.
Weather-Resistive Barrier and Drainage Plane
A continuous, properly lapped weather-resistive barrier behind the siding is non-negotiable in a climate this wet. On homes with heavier rain exposure, we also look at whether a rainscreen gap — a small air space between the barrier and the siding — makes sense, since it lets any water that does get past the siding drain and dry out instead of sitting against the wall sheathing.
Flashing at Every Penetration
Windows, doors, hose bibs, vents, and any spot where a deck or roof meets a wall need step flashing, head flashing, and kick-out flashing installed in the correct order relative to the weather barrier — flashing that directs water out and away, not one that just covers a gap. This is the detail that separates a wall that sheds driving rain for decades from one that develops a hidden leak within a few winters.
Fasteners and Hardware
Given the salt exposure, fastener choice matters more here than on a lot of inland King County jobs. Corrosion-resistant fasteners, correct fastener spacing, and correct embedment depth all affect how long the connection between siding and wall actually holds up against both wind load and rust.
Clearances
Siding needs proper clearance from grade, roof lines, decks, and patios so it isn't sitting in a wet zone where splash-back or standing moisture keeps it damp long after a storm passes. This is one of the most common shortcuts we see on older installations, and it's a major contributor to rot and staining at the bottom courses of a wall.
Why We Install Only James Hardie Fiber Cement
We don't install vinyl, LP SmartSide, primed spruce, cedar, or other fiber cement brands. That's a deliberate standard, not a sales pitch, and it comes directly out of what we see on jobs in wet, coastal-influenced climates like Shoreline's.
Fiber cement doesn't absorb water the way wood-based products do, so it doesn't swell, delaminate at cut edges, or feed the kind of sustained moisture problems a long moss season creates. James Hardie's factory-applied ColorPlus finish is baked on under controlled conditions rather than field-painted, which matters in a climate where paint gets fewer dry days to cure properly and where algae staining shows up fastest on inconsistent finishes. Hardie also builds climate-specific HZ product lines engineered for moisture-prone regions like the Pacific Northwest, which is a meaningfully different starting point than a general-purpose siding product.
None of that makes other products worthless — it's why we explain the trade-offs honestly rather than installing something we don't think holds up to this climate's demands.
| Factor | James Hardie Fiber Cement | Vinyl | Wood / Engineered Wood |
|---|---|---|---|
| Moisture absorption | Very low; won't swell or rot | Doesn't absorb, but can trap moisture behind panels | Absorbs moisture; prone to swelling and rot if exposed |
| Salt air / corrosion | Not affected directly; correct fasteners still required | Not affected directly; hardware still at risk | Fasteners at risk; wood itself can gray and degrade faster |
| Moss / algae resistance | Factory finish resists staining and cleans up well | Can stain; molded-in color isn't always uniform | Prone to staining and surface breakdown over time |
| Maintenance | Occasional wash; repaint optional, not required for protection | Low maintenance but can crack on impact and fade over time | Regular repainting or sealing needed to stay protected |
| Fire resistance | Non-combustible | Combustible; can melt or deform near heat sources | Combustible |
Our Installation Process on Shoreline Homes
- On-site assessment: we walk the exterior, check current siding and trim condition, identify moisture-prone areas (shaded walls, low clearances, past leak signs), and look at wall orientation relative to prevailing wind and rain exposure.
- Tear-off and substrate check: once old siding comes off, we inspect the sheathing underneath for hidden rot or damage before anything new goes on — this is often where a job either goes right or gets rushed.
- Weather barrier and flashing installation: the water management layer goes in first and gets checked before it's covered, since this is the part of the job nobody sees again once siding is up.
- James Hardie installation to manufacturer spec: correct fastener type, spacing, and clearance, following Hardie's published installation requirements rather than shortcuts that void the warranty.
- Trim, caulking, and detail work: corners, window and door trim, and penetration seals get finished so the whole assembly sheds water as one system, not a collection of individually sealed parts.
- Final walkthrough: we go over the finished work with the homeowner and point out anything worth knowing for long-term upkeep.
Signs Your Shoreline Home's Siding Needs a Closer Look
- Persistent moss, algae, or green-black staining that comes back soon after cleaning
- Soft, spongy, or visibly swollen spots, especially near the bottom of walls or under windows
- Paint that's peeling, bubbling, or needing repainting more often than every few years
- Rust streaks running down from fasteners, trim screws, or flashing
- Gaps, warping, or buckling at seams, corners, or trim boards
- Visible daylight or drafts around penetrations like vents, hose bibs, or light fixtures
- Musty smells, peeling interior paint, or discoloration on interior walls that back up to the exterior
Why Local Experience on Shoreline Homes Matters
Siding installation isn't identical from one King County neighborhood to the next, and a crew that regularly works Shoreline homes has already seen how this particular stretch of Puget Sound weather behaves against real walls — which elevations take the worst of the driving rain, which yards hold enough shade and moisture to grow moss fastest, and which older homes tend to have clearance or flashing shortcuts baked in from a previous remodel. That experience shows up in faster, more accurate assessments and fewer surprises once tear-off starts.
Working locally also means we're familiar with the permitting expectations King County and local jurisdictions apply to exterior work, and we're positioned to be reachable for warranty questions or follow-up long after the crew leaves the site — not a name that only shows up for the original bid.
What Affects the Cost of a Shoreline Siding Installation
| Cost Factor | Why It Matters |
|---|---|
| Home size and wall area | More square footage means more material and labor regardless of siding line chosen |
| Tear-off vs. new construction | Removing and disposing of old siding adds labor that new-construction installs don't have |
| Existing moisture or rot damage | Hidden sheathing damage found during tear-off needs repair before new siding can go on correctly |
| Trim, corner, and detail complexity | Homes with more windows, dormers, and architectural detail take more time to flash and finish properly |
| Story height and accessibility | Multi-story walls, steep lots, or limited equipment access affect labor and staging |
| James Hardie product line and finish | Panel profile, plank exposure, and ColorPlus color selection affect material cost |
We walk through these factors on-site rather than quoting blind, since the real cost drivers on a Shoreline home — especially any hidden moisture damage — usually aren't visible from the street.
After Installation: Keeping a Correctly Installed Wall Correct
A properly installed James Hardie exterior in this climate asks for less upkeep than wood-based siding, but "low maintenance" isn't "no maintenance." An occasional gentle wash removes the moss and algae buildup that's inevitable in a shaded, damp climate before it has a chance to stain permanently. Keeping gutters clear and grade/vegetation clearance intact around the foundation protects the clearances the installation was built around. Any caulking or sealant at penetrations is worth a visual check every year or two, since sealant is the one part of the assembly that wears out faster than the materials around it.
If you're weighing a siding replacement or repair on a Shoreline home, we're happy to take a look and walk you through what your specific home needs given its exposure, shade, and current condition. Reach out for a free, no-pressure estimate — there's no obligation, just a straight assessment from a crew that already knows this area's weather.